Saturday, August 18, 2012

Organized Jewelry

When we moved to California, I knew that our apartment would be tiny, its 450 square feet tiny, but my husband insisted we live on campus. It has actually worked out really well for us, especially since we are a 1 car family and it came furnished. My desire to buy furniture for an apartment in California is about zero since the goal is not to stay here, furniture seems permanent, like its a big commitment. So when we moved, I purposefully didn't bring very much jewelry with me. It all fit in a tiny box a purchased at the Mart of Walls. However, when it comes to jewelry, I am weak and my husband is generous, so pretty soon my little box was overflowing. Now my "jewelry box" looked like this:


and this: 

and this:


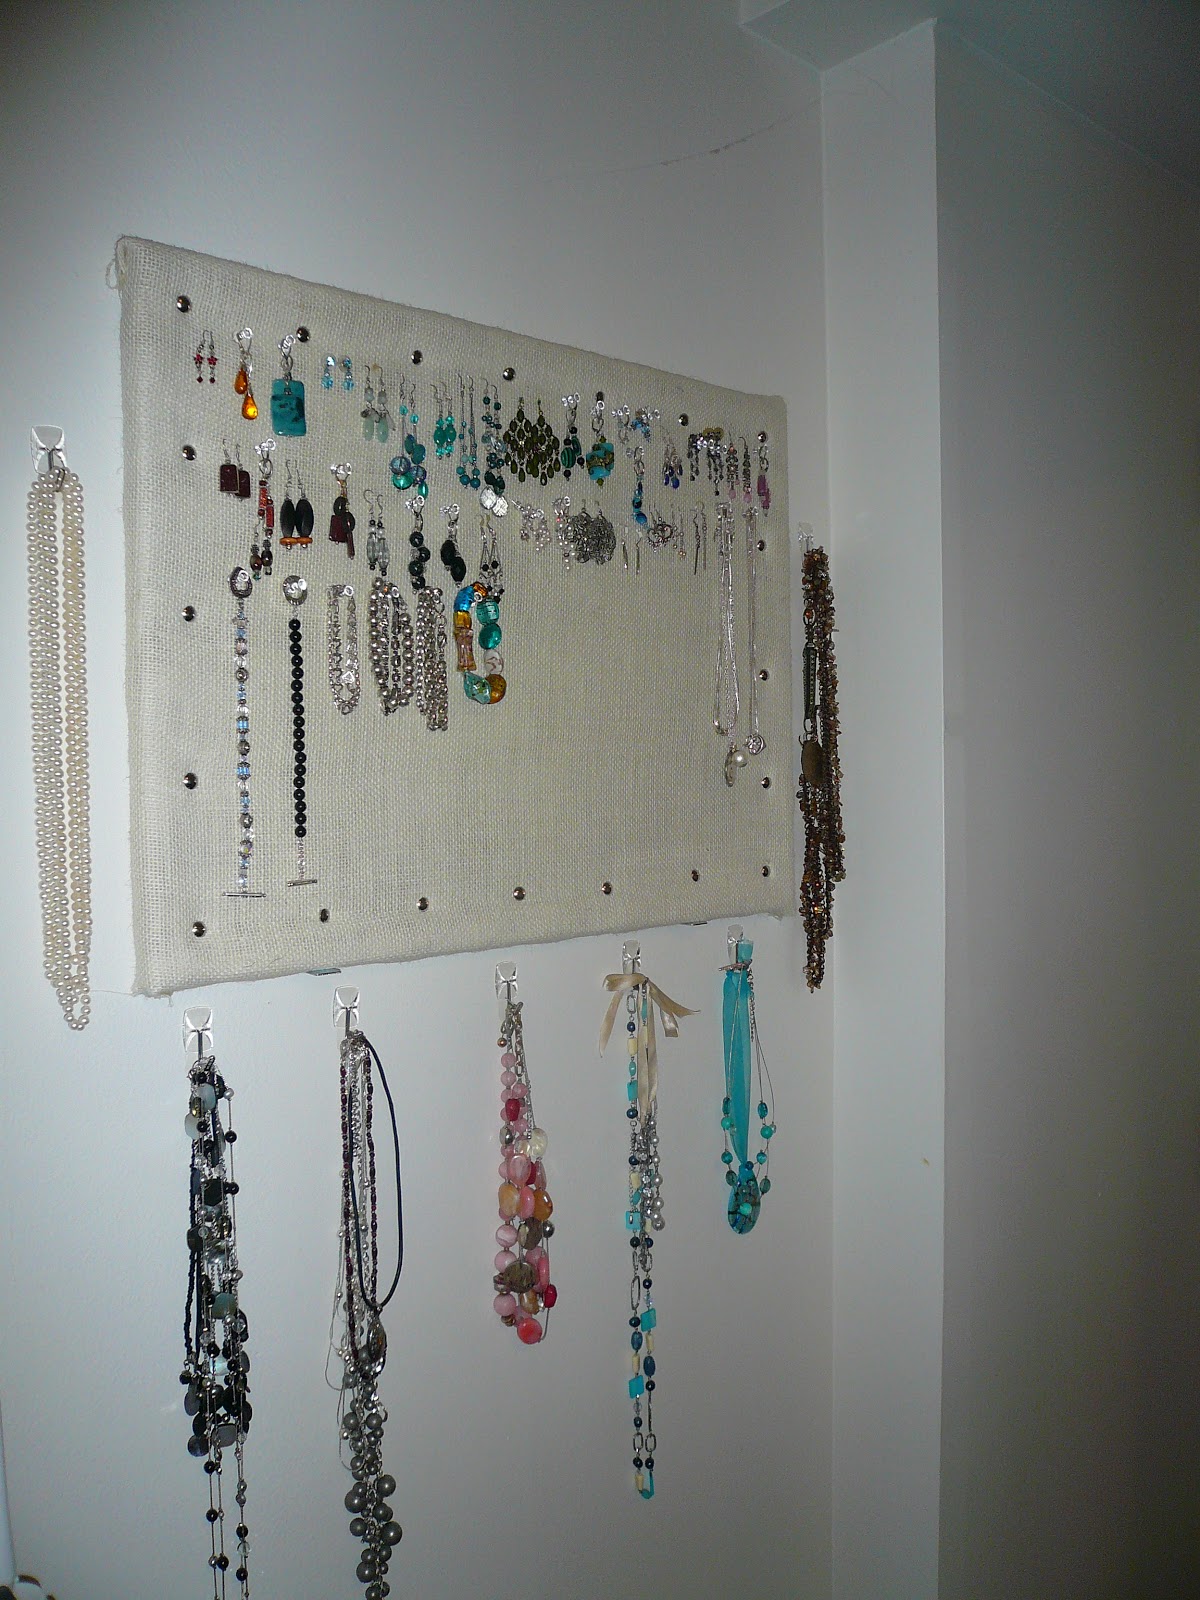
What!? You couldn't tell those were jewelry boxes? Yeah, me neither. It was bugging me for along time and since I am not working 60+ hours a week to finish a master's degree in 9 months anymore, I thought it was time to get to it. I bought a cork board, burlap, upholstery tacks, clear bulletin board tacks, and 3M command hooks and went to work. A few hours later, I now have a lovely place to store all my jewelry. 


I can't take credit for this brilliant idea. I stole it from the lovely Paige over at Simple Thoughts. Awhile ago she made one for herself, and more recently, her daughter made one. I really wish I could find the doorknobs her daughter used here, but we don't have a Hobby Lobby. Oh well, we don't have a drill either, so I guess it would be hard to attach them to the board anyway.  

I don't think I need anymore teal jewelry. Can you guess what my favorite color is?

I don't need more silver bracelets either.

Just cover the board with the burlap using the upholstery tacks around the edges. Hot glue the edges that stick out to the frame in the sides or back. Put the clear tacks into the board and hang jewelry and you are done.

Do you know what the best part of the project is? Look at all that room for new jewelry!


Friday, August 17, 2012

Kale Chips

I grew up in Colorado, the best place to live ever. Now I live in California, not the best place to live ever. Its my husband's fault really, he just had to get a Ph. D. and he just had to get it from Stanford, and Stanford just happens to be in California, so until he finally obtains said Ph.D. we are stuck here. But living in California with the love of your life is much better than living anywhere without him, so I try not to complain too much. I don't always succeed. Anyway, one of the best aspect of living here is the produce, it is plentiful and inexpensive. I have tried a plethora of foods I barely even knew existed before I lived here. One of my favorite discoveries has been kale chips. I thought people might be exaggerating a bit when they talked about how good they are. They were not. They don't taste like potato chips, but they do get crunchy, and they are delicious and nutritious. They are a totally guilt-free snack. And best of all, they are easy, perfect for the lazy cook. 

prep time: 10 minutes
cook time: 20 minutes
serves: 2

Ingredients:
1/2 bunch of kale
1/2 to 1 Tb olive oil
a little bit of salt

1. Heat oven to 350
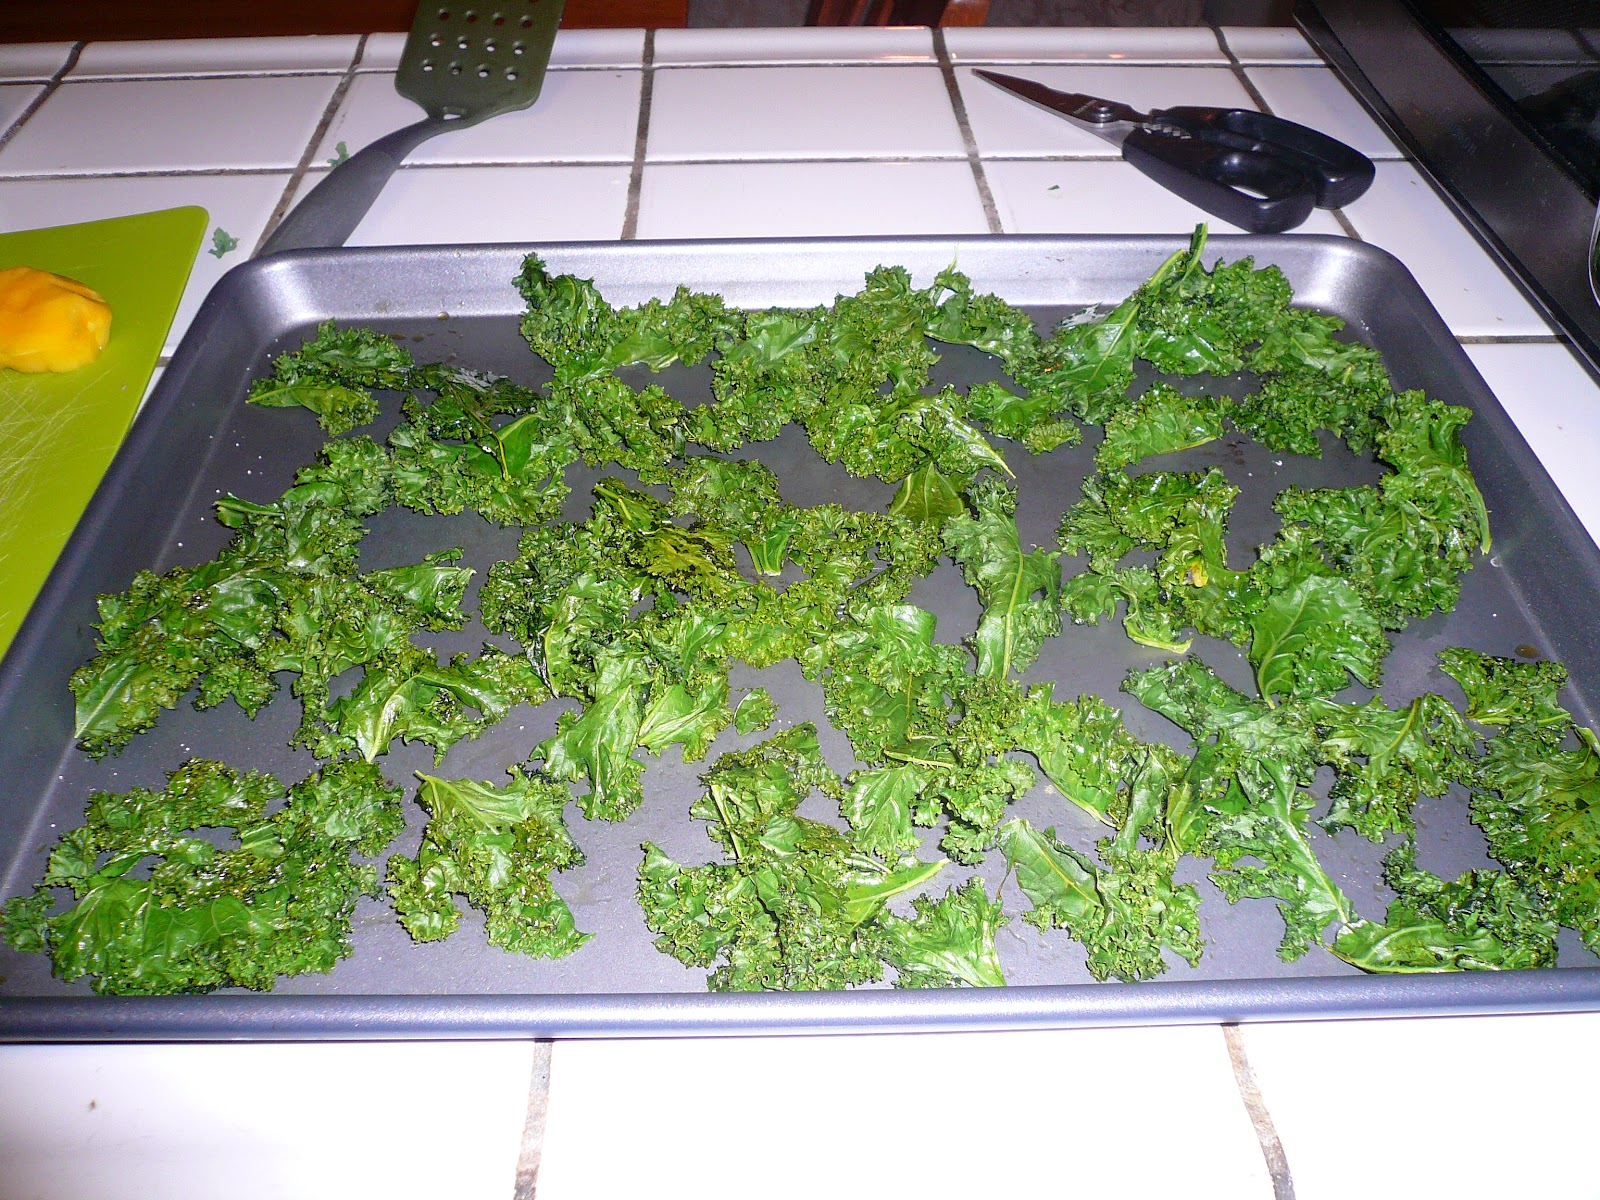
2. Wash and dry the Kale, it must be really dry to ensure that it crisps. To make sure mine is really dry, I skip the whole washing step. Yes, I am serious. I know you must be thinking: do you know what is on those heads of kale? Yes, yes, I do. I have a masters degree in environmental engineering and my professors informed me exactly what could be on that kale. It doesn't keep me up at night. You should have about this much kale:

3. Tear the kale into large pieces, removing the thick stems as you do. It will shrink quite a bit. 
4. Place it on a large cookie sheet and pour olive oil on top. Use your hands to make sure all the leaves have some oil. They should not be completely coated, but they should all have some oil. Start with 1/2 Tbs and add more if you need it. Evenly distribute the kale.
5. Sprinkle lightly with salt, they will shrink and get salty fast.
6. Place in oven for 10 minutes.
7. Remove and flip the pieces. They should be shrinking. 
8. Put back in the oven for about 10 minutes, but after 5 minutes, check it often to make sure they aren't turning black. They should have a papery, crispy texture when they are done.

These are great with different variations of olive oil and salt. This batch was made with chipotle olive oil and it was so good. You can also try garlic salt or other seasonings as well. I have also done an entire head of kale on only one sheet and it was fine. Enjoy!

Wednesday, August 15, 2012

Peach Crisp

Ok, so this isn't healthy, but it certainly is delicious. Some people try to make dessert healthier by replacing sour cream with yogurt, using Slpenda or low-fat ingredients, or making healthy nut cookies. I don't believe in that business. If I want to eat healthy, I'll go eat a salad thank you very much. Healthy food is delicious. However, if I want dessert, I want DESSERT, not something parading around pretending to be desert. I feel the same about meat, but that is for another post. For about the last month peaches have been $.79/lb at the only market that I can stand. I hate grocery shopping. Thank goodness that my husband was kind enough to take over that chore after a year of marriage. Anyway, if summer peaches are available in your area, try this out, unless you are trying to stay away from sugar.

Prep time: 30-45 minutes depending on if you peel the peaches
cook time: 1 hour 15 minutes
Serves: 8

Ingredients:

Filling:
about 7-9 large peaches sliced into 8ths*
2-3 Tbs instant tapioca
1 Tbs lemon juice
1/4 tsp cinnamon

Topping
1/2 cup butter straight from the fridge
3/4 cup cup sugar
3/4 cup flour
3/4 cup oatmeal

*If you don't like skin on your peaches, you can boil them for 1 minute, put them in cold water and the skin should come off. I tried it with the last crisp I made and the skin would not come off, so I left it on. This didn't stop the entire crisp from being devoured when I brought it as dessert for a dinner party, so since I am a lazy cook, I think I will leave the skin on from now on.
This recipe has been modified from a family apple crisp recipe, I am too lazy to peel the apples too. I know that bugs you Kate. :-)
1. Preheat oven to 350
2. Toss the filling ingredients in a bowl and place in a casserole dish, I used a 2 1/2 quart corningware dish, but a 9x13 works too. It should be about this full:


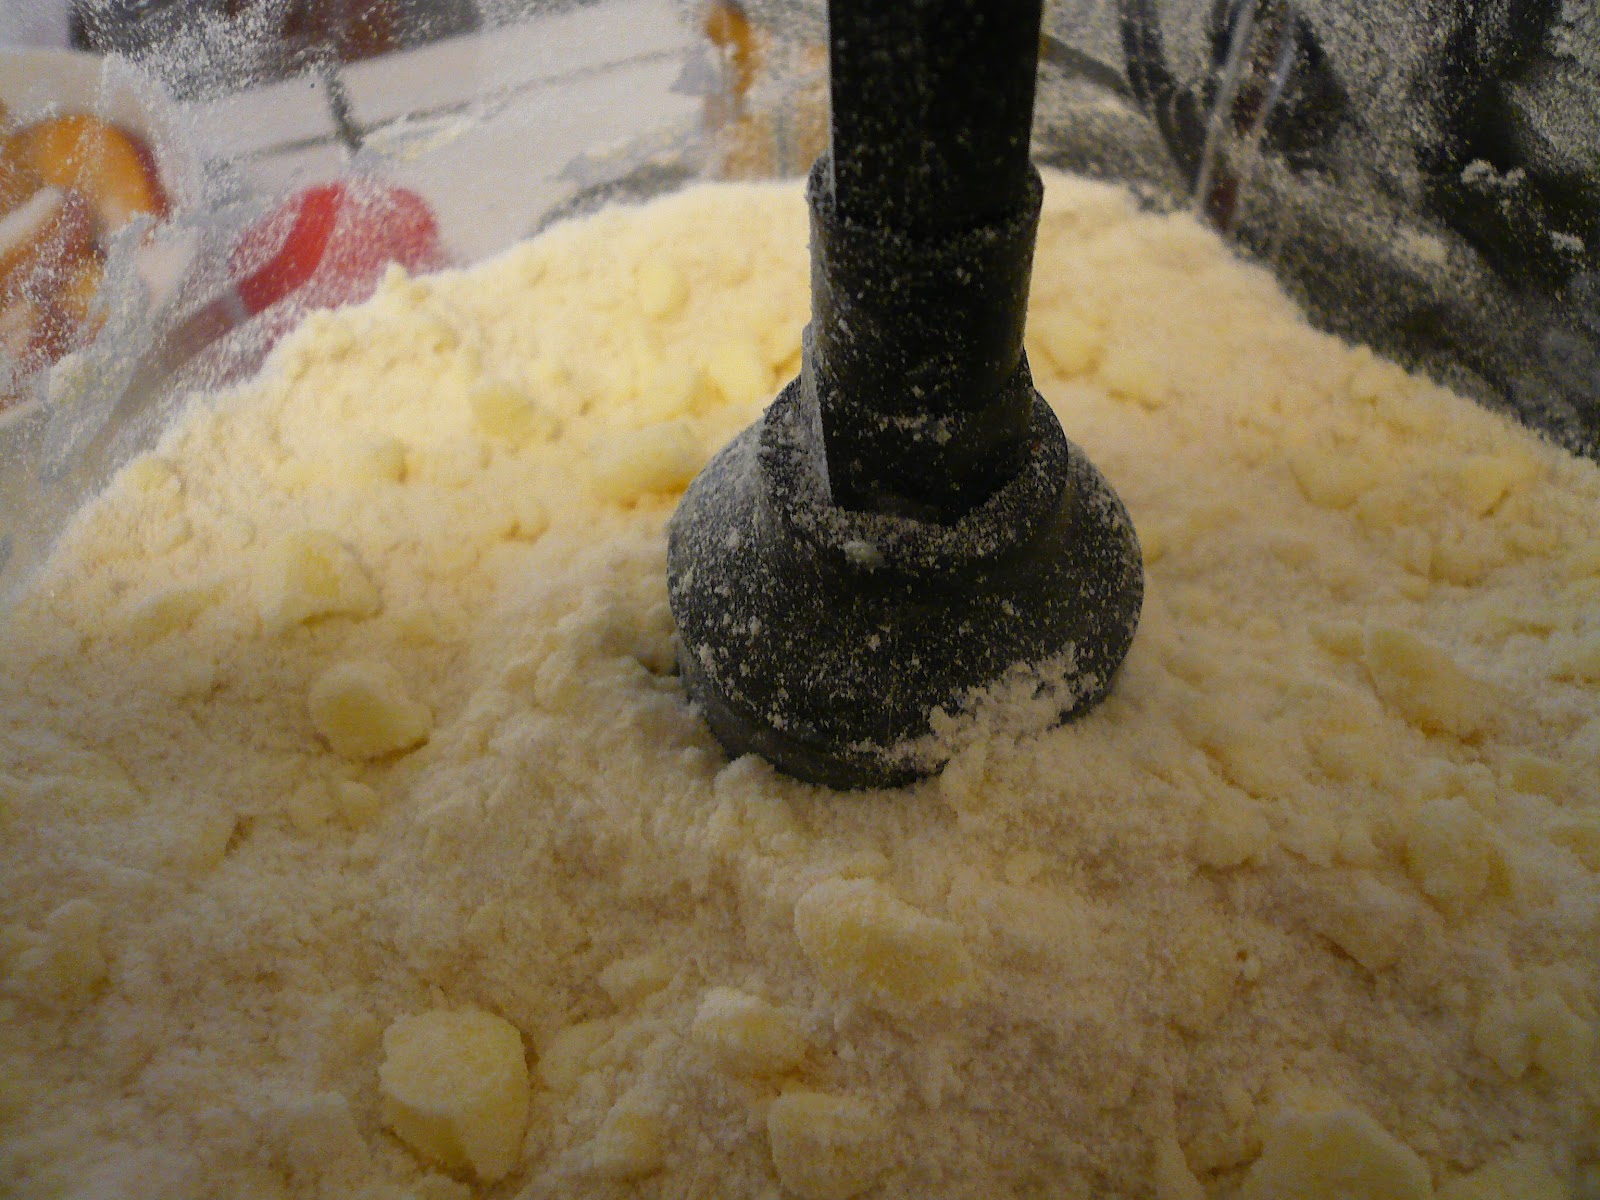
3. Put the sugar and flour into a food processor fitted with the "S" blade. Cut the butter into 1/2-1 Tbs chunks and place it in the food processor. Pulse until the butter is approximately pea-sized.

4. Add the oatmeal and pulse 2-3 more times, just to mix it in, but don't cut it up.
5. Sprinkle topping on peaches.
6. Bake for about 1 hour 15 minutes.

Note: This is not best right out of the oven, it is soupy and needs a few hours to set up. It is awesome served with vanilla ice cream. If you ask my husband, you should buy all natural ice cream, because it is well worth the extra price. We used to buy Breyer's, but then they changed their formula and the husband won't touch it anymore. Now we buy less, but much higher quality Ben and Jerry's. Kate, if you are wondering what to get Phil for a gift ever, you should buy him a Safeway gift card and tell him he can only spend it on Ben and Jerry's because he feels guilty spending that much on ice cream. 


Saturday, August 11, 2012

Mexican Soup

This is modified from the Weight Watchers 0 Points Mexican soup. I added beans, because everything is better with beans. 


Ingredients:

6 cups vegetable broth (I used 6 cups water and Better Than Bouillon)
14 ounces canned diced tomato
2 cups fresh green beans cut into 1 inch pieces (frozen is good too)
3 cloves garlic, minced
2 small zucchini cut in cubes
1 cup tomatillo, cubed (these look like green tomatoes with a weird papery skin that you take off)


1 poblano
1 medium jalapeƱo, membranes and seeds removed
1 medium red or yellow 
1 Serrano 


1/2 teaspoon dried oregano
2 roasted red peppers* 
1-2 teaspoon ground chipotle pepper
2 tablespoons lime juice 
1/2 cup fresh cilantro, chopped

1 medium poblano chili pepper
1 teaspoon cumin
2 cans black beans (or start with 1.5 cups dried beans and soak and cook)

*you can use canned, but that would require that I go to a real grocery store, so I just broil 2 red peppers and rotate until the skin is black, remove from oven and put in a covered bowl to steam them and then remove the skin

1. cut poblano, jalepeno, onion, and serrano into large pieces and pulse in the food processor until the pieces are slightly larger than salsa chunks. put in a large bowl
2. add all the other chopped vegetables and garlic to the bowl
3. blend the peppers in the food processor with 1 cup broth (or water and just use enough bullion to make up for it later)
4. Heat 5 cups broth until boiling
5. Add the veggies, reduce to medium, cook 10 minutes
6. Add the tomatoes, chipoltle pepper, cumin, lime juice, beans, and pepper mixture, heat through
7. Add cilantro to individual bowls

By the way, our favorite spice is cumin, so we use alot of it around here.

Quinoa Salad I


Well, there are sure to be many quinoa salads on this blog since I love the stuff and we buy it at Costco- meaning we could feed an army with our quinoa, so here is the first one.

Ok, I didn't put the avocados in here yet, but pretend I did

Time: 20 minutes
Feeds: 4 for lunch, 6-8 as a side dish

Salad
1 cup quinoa
2 cups water
1 14-oz can garbanzo beans
1 14-oz can kidney beans
3 roma tomatoes, chopped
2 green onions, sliced thin
2 avocados

Dressing
3 Tbs cup olive oil
2 tsp cumin
1 tsp chili powder
1/2 tsp pepper

Boil the water and add the quinoa, reduce to low and cover for 15 minutes
Meanwhile, put all the salad ingredients except the avocado in a bowl.
When the quinoa is done take it off the stove and add the dressing ingredients to the pan with the quinoa. Mix it all together.
Dump the quinoa on top of everything else and stir it all together
Right before serving, cube the avocados and  mix them in


Kate, I promise all the recipes won't be quinoa since you are probably tired of it since I feed it to you every time you are here. But its gluten free and that is the cool new trendy way to eat.

Just for you Kate

Ok favorite sister, since you asked for it, I am starting a blog with healthy (and not so healthy) recipes, even though there are already 1000s of blogs out there for that. Maybe I will talk about other topics too, we'll see.  Anyway, I guess I should post an actual recipe, so I guess I will go do that now.